Apparently I needed a little adventure in my life so I decided to build a cardboard harp from a kit. These great kits come from Dennis Waring at Waring Harps and are so much fun and educational to make! If you don’t have a new sincere appreciation for your harp builder after building one of these—you must already be a harp builder. Making the harp was a challenge and there might have been a lot of swearing involved as well but it was totally worth it! I thought I’d share the process with you.
First, here is my finished product! I think the harp came out pretty groovy. I’m just starting to get it up to tune but so far I am very impressed with the sound.
The kit comes in a box with full instructions and almost everything that you need. You supply the paint, if you want, and glue.


The first step is to assemble the frame—with the help of a little glue and some screws. I don’t have a picture of this but I also glued the bridge piece on to the frame. The strings rest against this and you’ll see this later in the process.
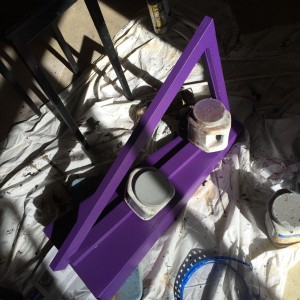
Next, if you want, you can paint the sound box and frame. Dennis Waring suggests that you put the zither pins in at this point but I wanted to wait until after everything was painted. I used my favorite spray paint.
Now it is time to assemble the sound box and attach the frame. Spend some time on this stage. Make sure that you see how everything is going to glue together and the sound box will be tight and without gaps. You really need two people when you are gluing. Here is another important point. Make sure you double check the fit and alignment of the frame and the cutout in the sound box for the strings. Pick the box up and peek inside. You might make a small mark on the top of the sound box so that when you glue the frame in place things line up. I missed the mark on this a little bit and it made it harder later to put the strings on. Dumb, dumb move on my part. Also, apparently I’m not as DIY as I thought because I couldn’t figure out the banding ties that he sent to hold everything in place while the glue dries. So I just used some handy paint cans. We’re cooking now!
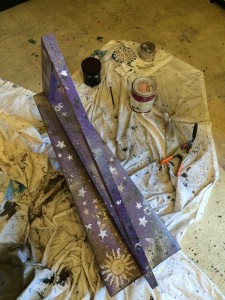
Here comes the fun part! And as I am want to do, I went crazy with the paint job. Far out, eh? Notice that I even painted the tuning key to match but this turned out to be a bad idea. I think because I didn’t prep it enough—I should have sanded it down a little bit first.
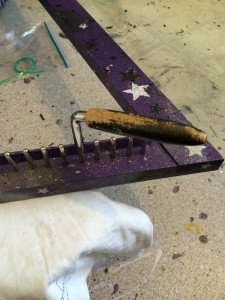
OK. This is the hard part. Zither pins. Hammer, twist, hammer, twist, swear, hammer, twist, swear, then FINALLY! I don’t know why but this part took me forever! But then when they finally seat into place, you can feel it catch and they slide right in. You have to be careful with all of this because you don’t want the pins to be loose later and you don’t want to split the frame. As you can see, there was so much twisting that I rubbed most of the paint off the tuning key! I got out my gardening gloves for this part to save myself from blisters. I guess I really do need to work on my DIY skills.
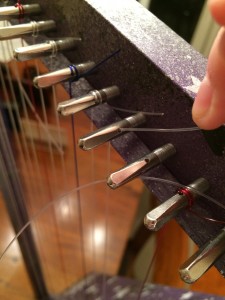
Now comes the stringing! Dennis suggests that you start on string 19 and work your way up. I suggest that you start on string 13 so that you get into the groove and then do the lower strings which are more difficult to work with. But then again I apparently don’t do enough restringing on my harps! This is a blessing, usually. I also prefer Sharon Thormahlen’s method of tying the inside loop. I also use toggles on every string although Dennis says to start at string 13. The string lengths that Dennis provided in my kit where sufficient but not generous so be careful at this point. I ended up breaking the lowest C string and I’ve had to order a replacement. I broke another low string but I had a replacement for that one in my Harpsicle string kit. I love my Harpsicles, by the way, but I couldn’t resist this challenge of building a harp and getting to paint it. Since I don’t do enough restringing on my Harpsicles I had trouble getting the hang of the motion to lock the strings in on the pins. Here is a quick tutorial…
Step 1. Make sure that the hole in the zither pin is up and down. Then put the string through the hole. On the larger, lower strings, you might have to trim the string to a point to get it into the hole. It is exactly the same width!
Step 2. Twist the pin a little bit, turning clockwise.
Step 3. Loop the string to the back of the pin and pull the string up towards the frame.
Step 4. Hold the string in at the bridge point so that as you continue to twist the pin the string will be caught under the string that is looping, as that strings is falling in place to the right of the hole. See above the visuals, they will help!
Wooo Hooo! We have a HARP! Now, I’m working on tuning and getting ready to play. I’m super impressed by how stable the harp is when it is standing up by itself. The harp feels study and substantial and I think the tone will be great when it gets in to tune.
Happy Harping!!


